
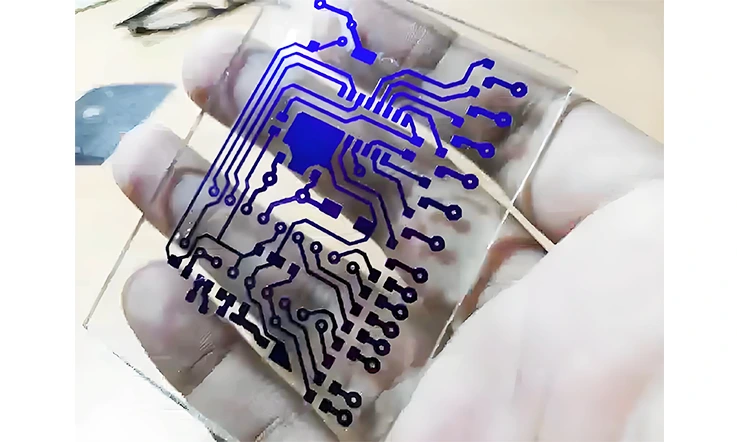
When working with RF modules, optical sensors, or display-integrated circuits, glass substrates provide a distinct advantage—offering flat surfaces, low signal loss, and excellent performance for optical paths or high-frequency applications. Compared to ceramic and polyimide substrates, glass delivers higher light transmittance, reduced dielectric variation, and more precise dimensional control when processed correctly.
This article doesn’t dance around specs. We look at trace spacing matched with dielectric constants, how to keep mechanical stress from biting into yield, and what trade-offs really show up when you scale from prototype to full-run. Need to drill sub-0.25mm vias on ultra-thin tempered glass? You’d better be working with a supplier who’s been around that block.
We also spell out how glass substrates stack up against ceramic and flexible polyimide—line by line, use case by use case—so you’re not left guessing.
What Is a Glass PCB?
Why It Matters in Modern Electronics?
Glass PCBs are shifting the paradigm for engineers building devices that demand high-frequency stability, tight optical alignment, or visual transparency. You won’t find these boards in your average IoT module — they’re built for gear that’s pushing boundaries: 5G front-ends, lidar assemblies, or display-integrated circuits. Unlike FR4 or even high-frequency PTFE boards, glass substrates combine electrical consistency with near-zero surface warp. That’s why they’re popping up in places like wearable optics and AR hardware.
Designers, fabricators, and OEMs who are chasing lower Dk, optical clarity, or improved thermal expansion matching with packaging materials are eyeing glass. Let’s break it down and dig into what makes these substrates tick — and how to decide if they belong in your next layout.
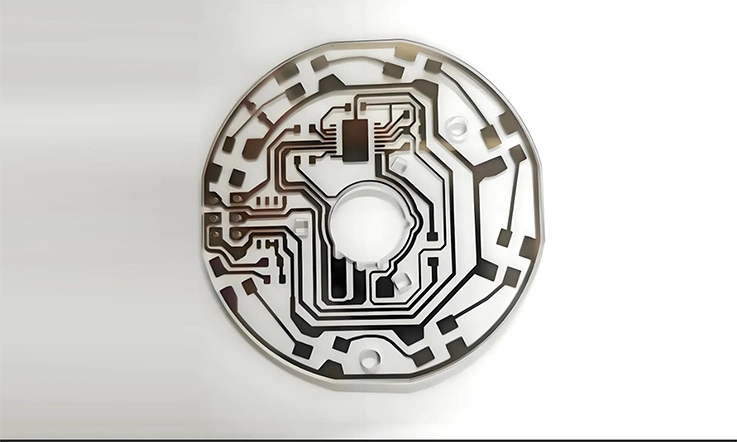
Glass PCB Basics: Transparent Circuitry for New-Age Devices
Since glass PCBs as the Tesla of substrate tech — clean, lean, and built for precision. These boards typically use quartz or borosilicate as the base, etched or printed with transparent conductive materials like ITO (Indium Tin Oxide) or ultra-thin metal meshes. You’re looking at transmission rates over 90% in the visible spectrum, with dielectric constants often around 3.7–4.2 — stable across GHz ranges.
| Property | Glass PCB | FR4 | Rogers RO4350B |
| Dk (10 GHz) | 4.0 | 4.5–4.8 | 3.48 |
| Loss Tangent | 0.005 | 0.02 | 0.0037 |
| Transparency | >90% | Opaque | Opaque |
| Max Temp | >400°C | 130°C | 280°C |
No joke — these specs are why engineers building optoelectronic gear or phased arrays are rolling with glass. It’s not just for show.
Glass PCB vs FR4: Material, Performance, and Cost Differences
FR4 might be the first choose for low-cost, general-purpose boards, but it’s no match when you’re chasing low insertion loss and consistent impedance. Glass substrates beat FR4 in surface flatness, thermal expansion stability, and optical clarity — all while dodging the moisture absorption headaches that plague traditional epoxy resins.
Still, don’t expect a free ride. Glass PCBs are tougher to drill, more brittle, and they won’t play nice with standard through-hole or mechanical fasteners. Need vias? You’re probably looking at laser micromachining or copper stud bumping. The cost? Easily 3~5x over FR4, depending on layer count and process tech. So unless your board’s doing double duty in optics or RF, it might be overkill.
Understanding the Role of Glass Substrates in Signal Transmission
Signal propagation through a glass substrate behaves differently — especially at mmWave frequencies. You’ll see less skew and lower dielectric loss across interconnects, particularly in tightly coupled differential pairs or controlled impedance lines.
For example, when running a 28 GHz signal in an RF transceiver module, FR4 substrates show far more phase delay than glass. That translates to cleaner eye diagrams and fewer timing errors.
Here’s the kicker: glass maintains that performance even as ambient conditions shift. Unlike polymer-based substrates, there’s almost no Dk drift with temperature or humidity. If your device needs to live in a sealed enclosure or outdoor environment, glass buys you more electrical predictability — and fewer retunes post-assembly.
Types of Glass PCB Substrates and Their Electrical Properties
Transparent substrates like glass aren’t just for show—they’ve carved out a solid use case in RF circuits, optoelectronics, sensor platforms, and wearable devices. The right substrate type can tighten up signal control, manage thermal drift, and support integration into displays or light-based systems. But here’s the kicker: not all glass behaves the same in high-frequency or high-heat environments.
Therefore, depending on the glass composition, these boards behave differently under heat, signal loads, and mechanical stress — making substrate choice a big deal when you’re designing for RF, mmWave, or optoelectronics. Let’s dig into what separates the options.
Quartz Glass PCB vs Borosilicate Glass PCB
Quartz and borosilicate glass are the two most used types in transparent circuit board manufacturing — and they’re nothing alike under the hood. Quartz glass PCBs, built from high-purity silicon dioxide, exhibit ultra-low dielectric loss, with a dielectric constant around 3.8 at 10 GHz, and can handle high-frequency signals with almost no energy loss. That’s a solid pick when your layout is fighting insertion loss or crosstalk in sub-6 GHz or mmWave designs.
Quartz Glass PCB-
●Made from highly pure silicon dioxide
●Delivers a stable dielectric constant (around 3.75–3.8 at 10 GHz)
●Supports low-loss performance across mmWave bands
●Low coefficient of thermal expansion (~0.5 ppm/°C), which pairs well with copper
●High transparency (up to 92%) from UV to near-infrared
Borosilicate Glass PCB-
●Composed of silica with boron trioxide additives
●Slightly higher dielectric constant (around 4.3)
●Tolerates mechanical stress better, more flexible during lamination
●Thermal expansion closer to 3.3 ppm/°C
●Lower cost and easier availability
On the flip side, borosilicate glass brings down costs and adds better machinability. But the trade-off is a higher dielectric constant (typically 4.0–4.6) and more thermal drift. It performs just fine for low-frequency optoelectronics, but RF engineers dealing with gigabit-class designs should think twice. The chart below helps clarify:
| Glass Type | Dielectric Constant (Dk) | Thermal Expansion (ppm/°C) | Frequency Suitability |
| Quartz Glass | 3.8~4.6 @ 10 GHz | 0.55 | RF/mmWave, 5G, LIDAR systems |
| Borosilicate Glass | 4.0–4.6@ 10 GHz | 3.3 | Optoelectronic, lighting, IoT |
Pro tip: If you’re targeting high-precision RF antennas or phased arrays, quartz has the edge on dimensional stability and dielectric predictability.
Dielectric Constant and Thermal Expansion in Glass PCB Materials
Dielectric behavior is one of the technical strengths of glass substrates, particularly in high-speed digital and RF circuit applications where impedance consistency and low dispersion are required. A stable dielectric constant across various frequency ranges contributes to minimizing timing skew and simplifies the design of differential pairs and impedance-controlled traces.
Take a high-density radar board, for example. If your Dk shifts across layers or frequencies, your impedance control goes sideways. With glass substrates like quartz, the Dk stays consistent across 1 GHz to 100 GHz. That predictability makes it easier to run signal integrity simulations and cut down on field failures.
Thermal expansion must be carefully managed. When the substrate and copper exhibit different expansion rates, microcracks and delamination may develop during thermal cycling. Quartz maintains a coefficient close to 0.5 ppm/°C, aligning well with copper. In contrast, borosilicate glass offers greater mechanical flexibility but tends to show more dimensional variation under elevated temperatures.
For high-reliability environments—think aerospace sensor arrays or telecom backplanes—this thermal match can make a measurable difference.
Optical Clarity, Rigidity, and Transparency in Glass PCB Design
When optical performance is part of your spec, glass substrates check a lot of boxes. Both quartz and borosilicate offer excellent light transmission—well above 85% in visible wavelengths—and stay clear even after high-temperature reflow.
Applications that leverage these features include-
●Transparent LED driver PCBs for aesthetic electronics
●Embedded optical encoders in medical devices
●Touch-sensitive control circuits in automotive displays
Rigidity adds to process predictability. Unlike polyimide, which tends to bend, or FR4, which may distort under soldering heat, glass stays flat and stable. This consistency supports accurate pad alignment in fine-pitch flip-chip and CSP layouts. The same behavior proves useful when transparent layers are stacked above OLED panels or when sensors are placed just beneath viewing areas.
| Application Type | Preferred Substrate |
| High-frequency antenna modules | Quartz Glass |
| Transparent capacitive touch systems | Borosilicate Glass |
| mmWave chip packaging | Quartz Glass |
| Automotive backlit buttons | Borosilicate Glass |
| UV sensor arrays | Quartz Glass |
So if your design needs to pass both optical and electrical inspection with flying colors, you’ll want to spec your glass type based on layout complexity, RF performance targets, and expected mechanical stress. Don’t just grab any transparent substrate off the shelf—know your numbers and pick accordingly.
Glass PCB vs Ceramic PCB vs Polyimide Substrates
When selecting between Glass PCB, Ceramic PCB, and Polyimide substrates, we need to consider a variety of factors, such as cost, performance, and the specific demands of their application. The choice of substrate material impacts everything from signal integrity to manufacturing feasibility, and each material has its strengths in different areas. The following sections provide a detailed comparison to help engineers make informed decisions based on the unique requirements of their projects.
Material Comparison: Cost, Performance, and Use-Case Fit
Choosing the right PCB substrate material often requires balancing cost, performance, and the type of application. Each of these materials brings specific characteristics to the table, making them more suited to certain uses.
Glass PCB-
●Cost: Glass PCBs tend to have a higher cost compared to other options, primarily due to the complex manufacturing process.
●Performance: Glass offers a low dielectric constant and high dimensional stability, making it a solid choice for high-frequency and high-density applications.
●Use Cases: Common in RF communication, microwave devices, and high-density integrated circuits.
Ceramic PCB-
●Cost: Ceramic substrates are often more expensive than many other materials, especially when using high-thermal conductivity options like Aluminum Nitride (AlN).
●Performance: Ceramic provides excellent thermal conductivity and mechanical strength, well-suited for high-power applications.
●Use Cases: Found in power electronics, LED devices, automotive systems, and other high-power applications.
Polyimide PCB-
●Cost: Polyimide-based PCBs are typically more cost-effective, making them reliable for applications where budget is a core consideration.
●Performance: Offers good thermal stability and low dielectric loss, commonly used in flexible circuits and moderate-frequency applications.
●Use Cases: Flexible circuit boards, wearable devices, and low-power electrical systems.
| Substrate Material | Cost | Performance | Common Applications |
| Glass PCB | Higher | High stability, high-frequency performance | RF communication, microwave applications |
| Ceramic PCB | Higher | Excellent thermal conductivity | Power electronics, LED systems |
| Polyimide PCB | Lower | Good thermal stability | Flexible circuits, wearable devices |
Thermal Expansion, Conductivity, and Dielectric Loss Review
Thermal expansion, conductivity, and dielectric loss influence how PCB substrates behave under high-frequency signals and elevated temperatures. These properties affect signal integrity, mechanical stability, and heat dissipation during prolonged or demanding operation.
Glass PCB-
●Thermal Expansion: Glass materials generally have a low coefficient of thermal expansion, which allows for better compatibility with metals such as copper and reduces thermal stress.
●Conductivity: Glass PCBs are known for their stable dielectric properties, ensuring minimal interference in high-frequency circuits.
●Dielectric Loss: Glass has low dielectric loss, which helps maintain signal integrity in RF and microwave frequencies.
Ceramic PCB-
●Thermal Expansion: Ceramic materials usually show a very low coefficient of thermal expansion, which helps maintain dimensional consistency in applications that experience frequent or intense thermal cycling.
●Conductivity: Ceramics are generally non-conductive but have high thermal conductivity, which makes them suitable for applications involving heat dissipation.
●Dielectric Loss: Ceramics exhibit low dielectric loss, making them effective for high-frequency applications with minimal signal degradation.
Polyimide PCB-
Thermal Expansion: Polyimide’s thermal expansion is generally higher than glass or ceramic, but it can be optimized depending on the material formulation.
Conductivity: Polyimide substrates are less conductive, which works well in applications that don’t require high electrical conductivity.
Dielectric Loss: Polyimide offers low dielectric loss, making it suitable for moderate-frequency applications.
| Material | Thermal Expansion | Conductivity | Dielectric Loss |
| Glass PCB | Low | High stability | Low |
| Ceramic PCB | Very low | Medium | Very low |
| Polyimide PCB | Higher (can be optimized) | Low | Low |
Application-Specific Recommendations for Substrate Selection
Selecting the right substrate material depends largely on the specific application and the performance criteria required. Below are some general recommendations based on common use cases.
High-Frequency Communication: Glass PCB, with its low dielectric constant and minimal dielectric loss, is often used for RF and microwave applications where maintaining signal integrity at high speeds is necessary.
High-Power Applications: Ceramic PCBs excel in environments where heat dissipation and mechanical strength are needed, such as in power electronics, automotive systems, and LED technology.
Flexible Circuits: Polyimide-based PCBs are a good fit for flexible circuit boards, wearable technology, and other applications where flexibility and lower cost are prioritized.
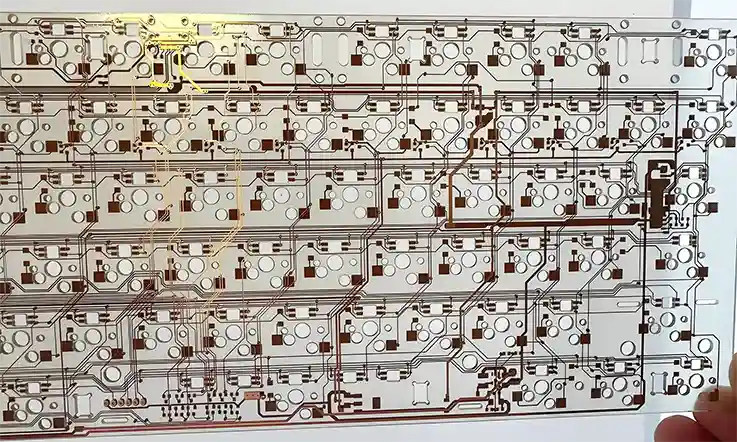
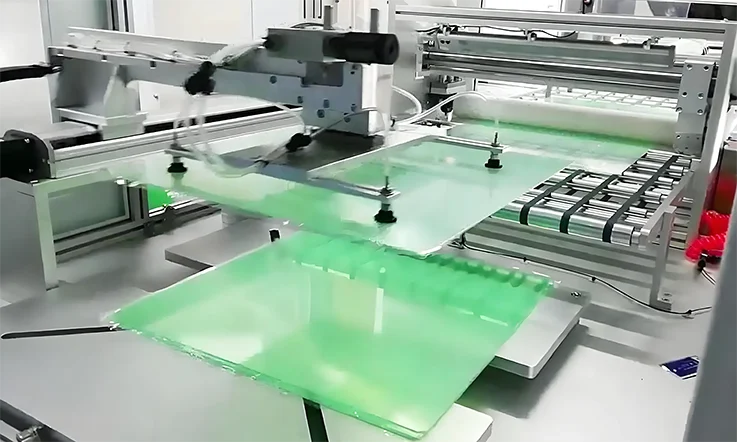
Glass PCB Manufacturing Process for Transparent Substrate Circuits
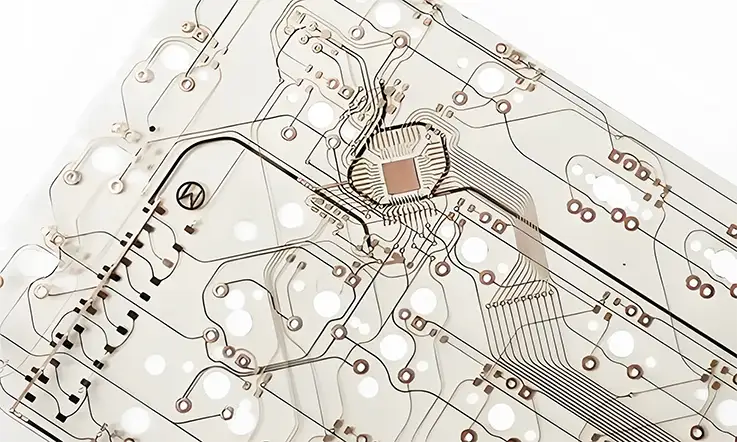
Producing transparent circuit boards based on glass substrates isn’t your typical FR4 workflow—it’s a different beast entirely. These fabrication methods cater to a whole different set of performance metrics: optical clarity, dimensional stability, low Dk values, and tight etch tolerances. Below is a breakdown of each stage in the glass PCB manufacturing process, laying out how cleanrooms, fine-pitch imaging, and advanced surface prep work together to make these things tick. If you’re designing for high-frequency or optoelectronic use, or just want your build to have an edge in transparent integration—this part matters.
Let’s walk through it, step by step.
Substrate Cleaning and Copper Lamination for Glass PCB Fabrication
Starting with a clean slate is everything—literally. Raw glass substrates such as borosilicate or quartz require meticulous surface prep before copper can be laminated.
Key Process Steps-
●Precision cleaning: Ultrasonic or plasma cleaning removes microscopic particles from the glass to ensure copper adhesion.
●Adhesion promotion: Surface treatment methods (like silane coupling agents) improve bonding between glass and copper foil.
●Vacuum lamination: Copper layers are applied under vacuum and high temp to prevent air gaps or delamination.
●Core thickness control: Lamination processes are tightly controlled to maintain uniform core thickness down to 0.1 mm for thin-core RF structures.
This stage is where missteps can tank yield—so no shortcuts allowed. Get this part dialed in and you’re halfway home.
UV Photolithography and Etching on Glass PCBs
Once copper is laminated, the real patterning begins. This is where photolithography and etching take over to define your traces, pads, and microvias with razor-sharp precision.
What Happens Here-
●Photoresist coating: A photosensitive layer is spin-coated over copper, prepping it for exposure.
●UV exposure: UV light hardens the resist through a photomask, locking in your circuit design.
●Developing and etching: The unhardened resist is removed, and exposed copper is etched away using a wet etch or plasma method.
●Line/space resolution: Modern glass PCBs allow trace widths and spacing down to 50 µm or tighter using LDI (Laser Direct Imaging).
For designs with embedded optical sensors or RF waveguides, precision patterning is must. This is where layout accuracy directly affects high-frequency signal integrity.
Surface Finishing, Solder Mask Application, and Quality Testing
Post-etching, it’s all about protecting the circuit and getting it ready for assembly. Unlike FR4 boards, glass PCBs demand specialty coatings and cleanroom-level inspection protocols.
Here’s How It Wraps Up:
●Transparent solder masks: Optically clear, UV-stable solder masks are applied to preserve aesthetics and protect against oxidation.
●Surface finish options: ENIG, OSP, or ultra-thin immersion silver may be used—each with implications for contact resistance and reflow profiles.
●Final inspection: Glass boards are run through AOI, flying probe testing, and sometimes interferometric flatness scans.
●Packaging: Dust-free, anti-static packing is required to avoid contaminating the optical layers or scratch-prone surfaces.
Limitations and Challenges in Glass PCB Fabrication
Working with glass substrates introduces a set of hurdles that don’t typically show up with FR4, PTFE, or ceramic boards. We’re talking brittle behavior during mechanical processing, tooling limitations, higher up-front investment, and fabrication methods that demand pinpoint accuracy. This section digs into what engineers and OEMs should watch for when scaling transparent circuit designs—no sugarcoating, just the technical realities and what we can do about them.
Brittleness and Yield Issues in Mass-Producing Glass PCB
When we’re pushing glass PCBs into production, the material’s mechanical behavior forces us to rethink everything from panel layout to depanelization.
●Fracture Risk: Unlike flexible substrates or FR4, glass doesn’t bend—it cracks. That means panel yield drops if handling and depaneling processes aren’t dialed in.
●Saw vs. Laser Cutting: Traditional mechanical routing tools often chip the edges. Laser scribing or waterjet cutting helps reduce mechanical stress and preserves edge quality.
●Thermal Gradient Control: Glass handles heat differently. A steep thermal ramp rate during lamination or soldering can lead to microcracks. We’ve found that a slower profile helps.
Example Issue: In one trial run using 150 mm × 150 mm fused silica panels, we saw up to 30% drop in yield due to edge chipping from conventional singulation. Switching to femtosecond laser cutting improved edge retention by over 85%.
| Process Step | Yield Impact (Standard Setup) | Adjusted Setup (Laser/Low-Stress) |
| Panel Scribing | 20–30% waste | <5% waste |
| Mechanical Drilling | High fracture probability | Replaced by UV laser via drilling |
| Edge Finishing | Requires polishing | Minimized with contactless cutting |
Cost Trade-Offs in Transparent PCB vs Standard Substrates
Glass PCBs don’t come cheap, and there’s no way around that. But cost isn’t just about materials—it’s also tooling, throughput, and design-for-fabrication complexity.
●Material Price Delta: Borosilicate or quartz glass can run 3~7× the price of standard epoxy-based laminates.
●Fabrication Overhead: Specialized handling, custom jigs, and low-speed drills or UV lasers slow things down and jack up fab costs.
●Low Scrap Tolerance: One fractured panel can burn the margins fast. That’s why design margins and fab alignment is must.
Application-Driven Use: We see glass most often in photonics, mmWave modules, and optoelectronic transceivers. These are areas where mechanical and optical transparency outweigh raw material cost.
| Substrate Type | Typical Sheet Cost (USD/pc) | Tooling Complexity | Processing Speed |
| FR4 | $2–$5 | Standard | High |
| Rogers RO4350B | $20–$30 | Moderate | Medium |
| Fused Glass PCB | $50–$100+ | High | Low |
Specialized Tooling and Expertise Needed for Glass PCB Processing
Let’s not kid ourselves—fab houses can’t just swap out FR4 for glass and expect the same line to run it. Transparent substrates need a shop with the right tools and a crew that knows their stuff.
●Custom Fixtures: Glass doesn’t behave like laminates. It needs vacuum hold-downs, soft-edge clamping, and non-abrasive handling systems.
●Laser Micromachining: UV or femtosecond laser systems are practically required for via formation and contour cutting without microfractures.
●Surface Prep: Copper adhesion on smooth glass needs special pre-treatment—sputtering, seed layers, or plasma cleaning. Skipping this leads to peel-off during reflow.
●Operator Training: Shops fabbing glass PCBs train their staff in brittle material handling and use remote monitoring for laser alignment systems.
| Equipment Need | Traditional PCB Shop | Glass PCB Shop |
| UV Laser Drill | Optional | Required |
| Glass Panel Handling | Not supported | Dedicated |
| Adhesion Enhancers | Minimal | Mandatory |
| Depaneling Method | Mechanical Router | Laser / Waterjet |
Advantages of Glass PCB for RF and High-Frequency Circuits
Glass PCB platforms are carving out real estate in RF and microwave designs that demand ultra-low dielectric loss, stable transmission properties, and long-term electrical consistency. For engineers diving into mmWave, satellite, radar, or 5G layouts, traditional substrates like FR4 or even mid-tier RF laminates might fall short when transparency, dielectric uniformity, or thermal stability under power loads matter more than bend or cost constraints.
This section breaks down practical design takeaways using quartz and borosilicate-based glass PCB substrates for RF and high-frequency circuits.
Low Signal Loss and Stable Dielectric in RF Glass PCB Layouts
Engineers dealing with high-speed signal chains or RF front ends know that low dielectric loss translates to reduced insertion loss. Transparent glass PCB substrates, especially fused silica types, hit the sweet spot for consistent dielectric behavior.
●Dielectric consistency across wide bandwidths: Quartz-based substrates typically offer Dk values near 4.0~4.6 with loss tangents around 0.0001–0.0003, which helps maintain signal shape across mmWave frequencies.
●Thermal durability for RF amplifiers: These glass boards hold their own in thermal cycling tests, with negligible expansion mismatch against copper layers when paired with matched CTE soldermask systems.
●High-frequency circuit repeatability: Compared to polymer-based laminates, signal paths on glass PCBs remain stable under temperature fluctuations and exposure to moisture.
EMI Shielding and Signal Integrity in Microwave Glass PCBs
With high-frequency boards, it’s not just about pushing signals cleanly — it’s also about keeping noise out. Glass PCBs, especially those built with grounded reference planes and controlled-impedance traces, can offer a sweet balance for microwave engineers.
●Transparency doesn’t mean RF vulnerability: Proper ground-signal-ground stackups on glass cores behave predictably, even up past 30 GHz.
●Stray coupling minimized with tighter glass weave and uniform etching: No-fiberglass structure means fewer surprises in edge coupling or field spread.
●Supports grounded coplanar waveguide or microstrip architectures: Engineers working on antenna feed lines or balun structures can benefit from the physical flatness and surface uniformity of glass.
If EMI headaches have been frying your last prototype, glass might help keep things clean from the inside out.
Suitability of Glass PCB for 5G, Radar, and Satellite Applications
From phased arrays to 5G small cells and even CubeSats, our engineers are leaning into materials that hold up across power, bandwidth, and miniaturization demands. Glass PCBs check some real boxes in this arena.
●5G RFIC support: Transparent glass substrates allow for tight integration with antenna-in-package (AiP) setups and interposer systems at mmWave.
●Radar module durability: The mechanical stiffness of glass PCBs handles vibration and shock loads found in vehicle-mounted or airborne radar enclosures.
●Satellite-grade dielectric tolerance: Low outgassing quartz variants comply with space-rated cleanliness and stability benchmarks.
So, if you’re laying out a beam-steering array or squeezing multiple filters into a 30 mm x 30 mm footprint, the dimensional stability and electrical predictability of glass might just open a new design window.
Glass PCB Stackup and Layering Techniques
Glass PCBs present unique challenges and opportunities in multilayer configurations. Their inherent rigidity and thermal stability make them suitable for high-frequency applications, but they require meticulous attention to stackup design, via formation, and impedance control.
So, compared to traditional laminates, glass demands more precision and offers less margin for error, especially when you’re gunning for high-density layouts or sub-10 GHz bandwidths. If you’re building out RF modules, optoelectronic interfaces, or 5G glass panels, it’s time to get under the hood of stackup tuning, via processing, and impedance planning.
Multilayer Glass PCB and Signal Routing Optimization
Stacking glass layers calls for sharp routing skills and a solid grasp of how signals behave at high frequencies across rigid substrates.
●Dielectric Behavior: Glass substrates tend to have a low dielectric constant (Dk:4.0–4.6epending on the glass type), which affects trace impedance. Designers need to adjust line width and spacing to hit target values like 50 Ω or 75 Ω.
●Routing Structures: Stripline and microstrip configurations help manage impedance and cut down on EMI across multi-layer builds. Stripline is strong useful when isolation is a core concern.
●Crosstalk Prevention: Slotting in solid ground planes between high-speed routing layers improves isolation and trims noise coupling across vertical stacks.
●Thermal Loadout: Glass doesn’t pull heat away like FR4 or metal-core substrates. That means extra copper, thermal vias, or heat spreaders may need to be baked into the layout.
●Adhesion Tactics: Use prepregs with matched CTEs and surface treatments to get better bonding between copper and glass during lamination.
Via Drilling and Plating Challenges in Glass PCB Stackups
Punching holes in glass isn’t a drill-and-go job. The stuff’s hard, brittle, and unforgiving—so the via strategy needs to be dialed in.
●Drilling Methodology: Skip mechanical drills. Use UV or CO₂ laser drilling to bore through glass without cracking it. UV lasers are better for tighter geometries.
●TGV Integration: Through-glass vias (TGVs) reduce interconnect distances and enable higher routing density. They’re frequently used in compact RF and optical packages where tight layouts and minimal signal delay are expected.
●Copper Deposition: Electroless plating gets things started, but it’s followed by electroplating to bulk up the copper layer for low resistance connections.
●Thermal Stress Control: Thermal cycling can wreck a glass board fast. Tweak the lamination profiles and pre-bake stages to stay within the material’s tolerance range.
●Inspection Routines: Use X-ray and scanning acoustic microscopy (SAM) to spot cracks, voids, or incomplete plating in vias—without slicing up your boards.
Layer Alignment and Impedance Control in RF Glass PCB Designs
Alignment in glass stackups doesn’t leave much room for error. For RF circuits especially, sloppy layer shifts or inconsistent impedance will wreck performance.
●Registration Precision: Glass PCB registration needs to be locked in tight—usually within ±10 µm—to ensure vias connect clean and layers stay aligned.
●Controlled Impedance Traces: Match dielectric constant with trace width and spacing to keep your transmission lines predictable. No guesswork here—bring in field solvers.
●Simulation Before Fabrication: Use full-wave EM solvers to test stackup performance before committing to a build. That’s how you avoid bad impedance mismatches or return loss.
●Ground Plane Placement: Line up solid ground under microstrips and around signal layers. That keeps return paths short and reduces EMI headaches.
●Material Uniformity: Go with glass and prepregs that don’t shift their dielectric behavior over your frequency band—especially when you’re running RF or mmWave.
Glass PCB for HDI and High-Density Component Integration
High-Density Interconnect (HDI) technology has become a go-to solution for compact circuit designs that demand space-saving layouts and optimized electrical performance. When paired with glass substrates, HDI Glass PCBs take on an even more refined role, accommodating smaller, faster, and more intricate designs. Their durability, alongside high-frequency capabilities, makes them suitable for integrating numerous components into tight spaces, a necessity in today’s electronics—whether for wearables, smartphones, or IoT devices.
Glass PCBs provide a unique advantage in high-density designs, enabling us to build reliable, robust circuits that not only save space but also maintain performance. By understanding the specific needs of HDI construction with glass substrates, we’re able to create boards that withstand both the mechanical and electrical demands of modern electronics.
Benefits of HDI with Glass PCB in Compact Circuits
When we combine HDI techniques with glass PCBs, we get a host of benefits that make compact designs easier to achieve. Here’s how this combination can help us meet the challenges of high-density layouts:
●Space-Saving Layouts: Microvias and fine-pitch routing let us optimize space without losing performance. In applications like wearable electronics, where every millimeter makes a difference, this approach becomes particularly useful.
●Reduced Signal Loss: Thanks to glass’s low dielectric constant and stable thermal properties, we can achieve minimal signal loss, even in tightly packed designs. This helps us maintain the integrity of high-speed signals across all layers.
●Improved Durability: The inherent rigidity and mechanical strength of glass substrates guarantee that our designs remain stable and reliable under stress, in applications such as mobile phones, IoT devices, or industrial equipment.
●Thermal Efficiency: Glass maintains a consistent structure under elevated temperatures, making it a dependable choice for assemblies that include heat-sensitive components. In densely packed layouts, its low thermal expansion helps prevent warping and stress-related defects over time.
Microvias, Blind/Buried Vias in Glass PCB Construction
When it comes to creating interconnections in HDI layout designs, microvias and via types like blind and buried vias are indispensable. However, working with glass introduces some unique challenges that require specific techniques to get the job done right.
●Microvias: These tiny vias (often under 100 µm in diameter) allow us to route signals through dense boards without taking up valuable space. For glass PCBs, laser drilling is our first method for precision and minimal thermal impact.
●Blind and Buried Vias: Blind vias link outer layers to the internal stack, whereas buried vias connect only the inner layers. These structures allow for more compact high-density interconnect (HDI) layouts, helping to reduce board area while maintaining signal path integrity.
●Via Formation in Glass: Creating vias in glass is more challenging due to the material’s hardness and brittleness. But with the right techniques, like laser drilling, we can ensure precise via formation without cracking or damaging the substrate. This enables us to maintain high-density interconnections in our designs.
Case Study: HDI Glass PCB in High-Speed Wearable Electronics
To illustrate how HDI glass PCBs perform in real-world applications, let’s look at their use in high-speed wearable electronics. Here’s an example of how we apply our knowledge of HDI and glass PCBs in a fitness tracking device:
●Design Constraints: Wearables need to be compact, lightweight, and efficient. By using HDI techniques and glass substrates, we can achieve high-density layouts that fit within the tight space requirements of these devices.
●Signal Integrity: With glass’s low signal loss and stable dielectric properties, we can ensure that high-speed signals—such as Wi-Fi, Bluetooth, and GPS—maintain their integrity even in a small, thermally challenging environment.
●Material Choice: In this case, selecting the right prepreg and core materials that complement glass enhances not only the mechanical stability of the board but also its thermal and electrical properties, ensuring long-lasting, reliable performance.
Glass PCB Design Considerations for Engineering-Grade Performance
When we dive into glass PCB engineering, we’re working with a substrate that behaves very differently from traditional FR-4 or even high-frequency laminates like Rogers. It’s stiffer, thermally stable, and optically clear, but that also means tighter tolerances and specific layout strategies. Below, we walk through some of the major touchpoints when it comes to RF behavior, mechanical layout, and environmental durability—especially for folks designing systems that need to stay sharp under tough conditions.
Matching Dielectric Constant with Line Width and Spacing
Getting trace widths right on a glass PCB isn’t just a geometry exercise—it hinges on knowing how the glass behaves electrically. Most glass substrates hover around a dielectric constant (Dk) of 4.0 to 4.6 depending on composition and temperature. That means we’ve got to tune trace widths, spacing, and ground reference layers accordingly to hit our target impedance.
●Glass Dk values often range between 4.0 and 4.6. at 10 GHz, depending on purity and surface treatment
●We typically design for 50 Ω microstrip or 100 Ω differential impedance, which means tighter trace geometries than on FR-4
●Edge-coupled striplines on glass demand symmetrical layer spacing and ultra-clean etching to avoid impedance swings
●As line widths shrink below 100 µm, manufacturing tolerances and copper roughness start driving impedance drift—so we model everything upfront using 3D field solvers like Ansys HFSS or Keysight ADS
●Glass’s low loss tangent (0.0007 to 0.001 at GHz frequencies) helps preserve signal quality in dense RF layouts
| Parameter | Typical Range (Glass PCB) | Notes |
| Dielectric Constant (Dk) | 4.0 – 4.6 | Depends on glass type and orientation |
| Loss Tangent (Df) | 0.0007 – 0.001 | Measured at 10 GHz |
| Line Width (for 50Ω) | 70 – 110 µm | Based on 100 µm substrate thickness |
| Copper Thickness (Base) | 9 – 18 µm | For HDI designs |
Mechanical Stress Management in Glass PCB Layout
Unlike resin-filled laminates, glass won’t flex or deform under moderate pressure—great for dimensional stability, but not forgiving if your design’s under mechanical stress. Cracks, delamination, and trace fractures are real risks if we don’t plan around thermal cycles and load-bearing zones.
●Glass PCBs offer near-zero z-axis expansion (CTE ≈ 0 ppm/°C), which stabilizes interlayer spacing under heat.
●But lateral rigidity means we need to avoid tight bend radii or concentrated mechanical clamping near vias or edge connectors.
●We run stress simulations on corners, screw points, and mounting zones using FEA tools—no guesswork here.
●Copper trace routing should avoid sharp turns or abrupt width transitions near high-stress areas.
●Glass thickness typically ranges from 100 µm to 300 µm for HDI designs—thinner substrates reduce cracking risk but demand tighter process control.
| Property | Value (Typical Glass PCB) | Engineering Note |
| Coefficient of Thermal Expansion (CTE) | 0 ppm/°C | Excellent dimensional control |
| Flexural Strength | 200 MPa | Lower than FR-4 or ceramic |
| Minimum Bend Radius | Not Recommended (<10 mm) | Risk of fracture |
| Max Operating Temp (Static) | 250°C | Based on substrate + copper limits |
Ensuring Reliability of Glass PCB in Harsh Environments
If we’re deploying circuits in aerospace, industrial RF, or outdoor 5G enclosures, we’ve got to make sure glass PCBs can survive more than just lab conditions. From thermal shock to humidity to long-term UV exposure, glass behaves differently than organic laminates—and that means different qualification processes.
●Glass substrates don’t absorb moisture (0% water absorption), which keeps dielectric stability locked in during humidity cycling.
●We’ve tested boards through -55°C to +125°C thermal cycling—minimal expansion and no delam seen with proper via anchoring.
●Surface finishes like ENEPIG or OSP should be selected based on thermal reliability, especially in aerospace-grade builds.
●Edge encapsulation helps prevent micro-fractures or ion migration in exposed trace edges.
●In optoelectronics, surface transparency must be preserved under UV aging—so we use specific anti-reflective coatings or barrier layers.
| Test Condition | Result (Glass PCB Typical) | Notes |
| Thermal Cycle (-55°C to 125°C) | <0.05% Δ impedance | No cracking with stress relief layout |
| Humidity Soak (85% RH @ 85°C) | 0% moisture absorption | No Dk drift or blistering |
| UV Exposure (1000 hrs) | No yellowing or delam | Coating dependent |
| Salt Spray / Corrosion Test | Stable with ENEPIG | No trace degradation |
How Choosing the Right Glass PCB Manufacturer?
When it comes to sourcing glass-based substrates for RF and optoelectronic work, manufacturer selection isn’t just a paperwork decision—it affects PCB Layer stackup planning, etch uniformity, and the real-world viability of transparent or ultra-high-frequency circuitry. Unlike conventional FR-4 or even ceramic builds, glass substrates introduce a mix of thermal, mechanical, and optical behaviors that demand specific handling. Let’s break down what folks in the fabrication business should actually be looking at before locking in a supplier for prototype runs or production-scale lots.
Evaluation Criteria: Capabilities, Tolerances, and Process Control
Glass PCB fabrication isn’t a drop-in process. It rides on ultra-tight process windows for dimensional stability, drill quality, and dielectric layer thickness control. Unlike FR-4 or PI laminates, where thermal compliance and mechanical give allow some leeway, glass requires more rigid setups, laser-assisted drilling, and advanced surface prep—especially in builds with fine-line copper or sub-100 µm traces.
●Fabricators must demonstrate control over via placement within ±25 µm, particularly on multi-layer transparent interconnects.
●Inspection protocols should document flatness retention post-lamination and after thermal cycling.
●For RF builds, dielectric constant tolerances (±0.05 or tighter) often make or break insertion loss limits.
Also, keep an eye on their ability to handle non-standard panel sizes or custom glass formulations—this affects board yield and layout flexibility. Don’t be shy—ask for real metrology data, not just capability claims.
Prototyping Glass PCB for RF and Transparent Applications
When pushing into 24–77 GHz or working with LiDAR modules, early-stage glass PCB prototypes can surface parasitics, impedance mismatches, or etch deviation faster than any simulation. And for optically clear designs, alignment precision and laser-cut channeling for optical fibers or transparent antennas can’t be an afterthought.
RF engineers should expect vendors to support:
●Panel-level dielectric modeling with glass-specific Dk/Df values
●Transparent soldermask compatibility with UV-sensitive components
●Support for hybrid stackups (e.g., glass + Rogers + LCP)
Here’s a look at typical prototype turnaround windows based on substrate type:
| Substrate Type | RF Glass PCB | Rogers-Based PCB | Polyimide Flex |
| 2-Layer RF Sample | 7–10 days | 5–7 days | 6–8 days |
| 4-Layer Transparent | 10–14 days | 7–9 days | N/A |
| Hybrid Stackup | 14–20 days | 10–15 days | 12–18 days |
Quality Assurance and Certifications for Glass PCB Fabricators
Certifications don’t reveal every aspect—but they help establish a foundation for filtering out unstable vendors from those that maintain consistent production discipline. For builds related to aerospace, telecom, or defense RF systems, factors such as traceability, coating consistency, and documented high-voltage testing often define the acceptance criteria.
●Look for ISO 9001 and preferably AS9100 certifications if you’re dealing with aerospace-linked glass RF interconnects.
●MIL-STD-883 testing for thermal shock and microsection review can expose issues before boards are mounted.
●Ask if they’ve produced boards under ENIG, OSP, or other non-standard finishes on glass—some finishes react poorly to certain glass chemistries.
And don’t ignore downstream inspection capabilities. If they’ve got automated AOI for 50 µm features or can verify glass edge chamfer within ±10 µm, you’re probably dealing with a PCB factory that takes mechanical yield seriously.
Why Choose JarnisTech as Your Glass PCB Supplier?
At JarnisTech, we don’t just ship PCBs—we build long-standing collaborations rooted in process consistency, engineering dialogue, and technical transparency. With over ten years under our belt in glass PCB fabrication and international delivery, we’ve walked the walk across RF designs, transparent electronics, and custom substrate work.
Our Glass PCB Capability
| Item | Specification |
| Board Thickness (mm) | 0.5 – 4 |
| Layer Number | 1 –4 |
| Base Copper Thickness (µm) | 6 – 45 |
| Minimum Track Width | 150 µm ± 20 µm |
| Minimum Hole Size | 0.2 mm ± 0.05 mm |
| Max Panel Size | 600 × 1420 mm |
| Transparency | 87% – 98% |
| Surface Finish | OSP, ENIG, Immersion Nickel, Immersion Tin, ENEPIG |
| Available Substrate Materials | Tempered Low Iron Glass, Float Glass, Sapphire Crystal Glass, Quartz Glass |
We’ve set up our production lines to handle the unique quirks of glass. This isn’t a material you can treat like FR4 or polyimide—it demands a whole different approach. That’s why our facility includes laser direct imaging for ultra-fine geometries, specialized drilling for glass, and polishing protocols that keep optical clarity on point. We’ve tuned our workflow to meet the real-world needs of engineers pushing boundaries in signal integrity, heat tolerance, or visual design.
Our in-house technical team is on call to hash things out—line impedance mismatches, copper adhesion, custom thickness builds, you name it. We work side-by-side with our customers during prototyping, so there’s no “black box” feeling in the production handoff. Instead of waiting on email chains or vague promises, you’re dealing with a team that speaks layout fluently and responds with actual process feedback, not boilerplate replies.
We take cost into account with care. Our approach aims to match project needs with practical pricing—no inflated tooling charges, no hidden adjustments. From limited-volume transparent RF boards to larger batch requests, our process is set up to adapt. Clear communication and steady coordination remain part of every quote.
We’re not in this to be flashy—we’re here to deliver consistent builds, honest support, and a fab process that’s been proven in some of the most demanding applications.